Buy, renew and replace ISP and datacenter IPs
Static IPs are bought as a plan: a location, a number of IPs and a term of 1, 7, 30 or 90 days. They are yours alone for that term, renew automatically from your balance unless you switch renewal off, and can be replaced from the plan's Settings when one does not work on your target.
Written By Carmine Cella
Last updated 1 day ago
Static IPs are bought as a plan: a location, a number of IPs and a term of 1, 7, 30 or 90 days. They are yours alone for that term, renew automatically from your balance unless you switch renewal off, and can be replaced from the plan's Settings when one does not work on your target.
Buy
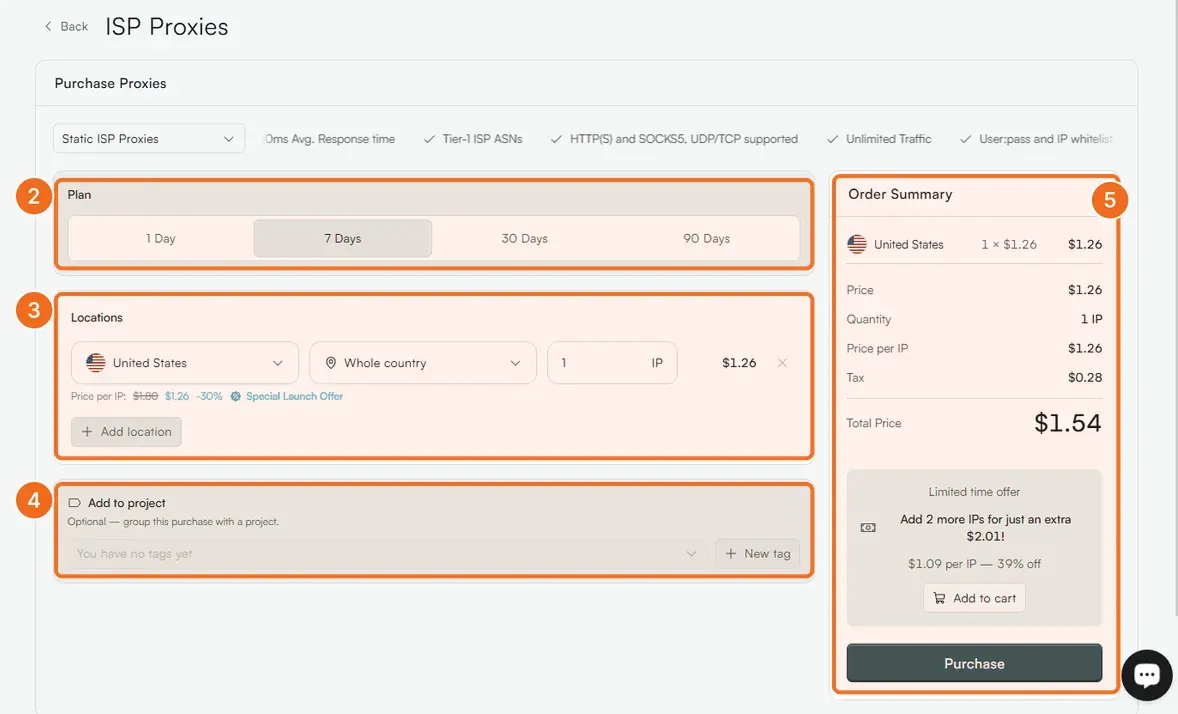
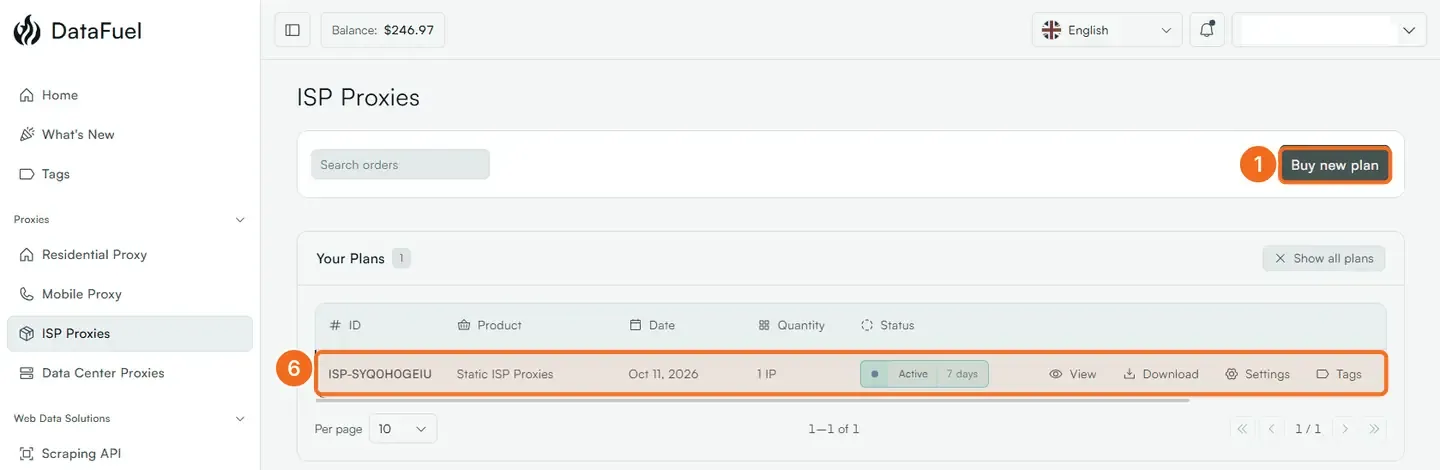
- Open ISP Proxies (or Data Center Proxies) and click Buy new plan.
- Under Plan, pick the term: 1 Day, 7 Days, 30 Days or 90 Days.
- Under Locations, choose the country, then Whole country or a region, and the number of IPs. Add location puts several locations into one order. The price per IP and any launch discount are shown under each line.
- Add to project is optional: a tag that groups this purchase with others.
- Check the Order Summary: price, quantity, price per IP, tax and the total. Click Purchase. The amount is taken from your balance.
- The plan appears under Your Plans within minutes with its ID, product, date, quantity and status.
Connect
On the plan's row, View opens the Proxy list: one line per IP in the format you choose (host:port:user:pass by default), with Download and Copy. Each IP is used directly, with no gateway; the same port accepts HTTP, HTTPS and SOCKS5.
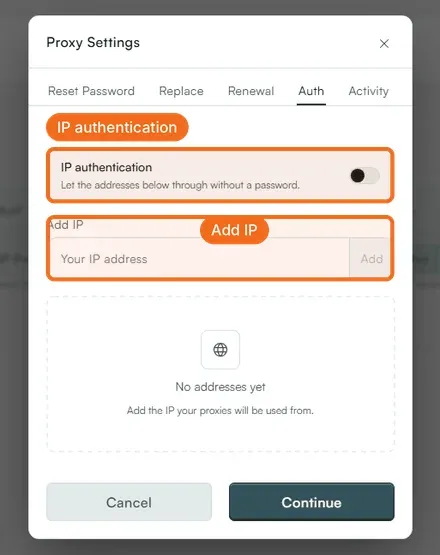
curl --proxy http://USERNAME:PASSWORD@203.0.113.45:23503 https://ipinfo.io/jsonIf you prefer no password, open Settings → Auth, switch on IP authentication, add the addresses your proxies will be used from, and click Continue.
Renew
Renewal is on by default. Settings → Renewal shows the switch, the date the plan renews on, what it renews for and the term; renewals are taken from your account balance, so keep it topped up. Switch Auto renewal off to let the plan end at its date. At expiry the IPs stop and return to the pool; they are not reassigned to you later, so renew before expiry when the specific IPs matter.
Replace an IP
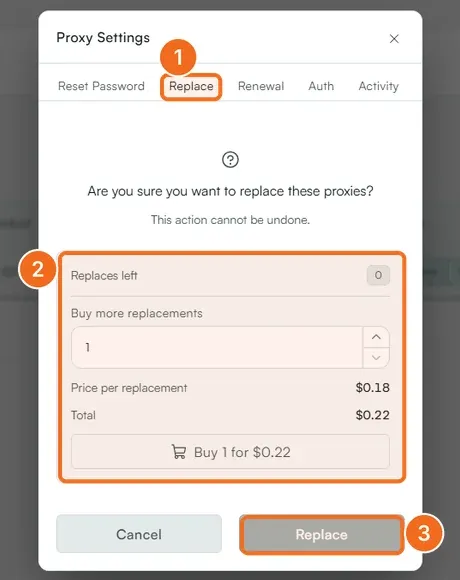
- On the plan's row, click Settings, then the Replace tab.
- Replaces left shows how many replacements the plan still has. If it is 0, choose how many to buy; the price per replacement and the total are shown. Click Buy.
- Click Replace and confirm. The old IP is withdrawn and a new one in the same location is assigned with new credentials. This cannot be undone.
An IP that is unusable on delivery (blocked everywhere, misrouted, wrong location) is replaced without using your replacements: tell support which one.
Reset Password issues new credentials for every IP on the plan; Activity lists recent connections.
If it did not work
- Empty reply from server. The expected answer to a wrong password, a blocked port or a restricted target; see the troubleshooting article.
- Connection timed out. The plan expired or the IP was replaced; check Your Plans and open View for the current list.
Related
Was this helpful?
Still need help? Ask the team